How to paint your kitchen cabinets WITHOUT STRIPPING! Don’t worry-It still looks professional! Here are the step-by-step instructions on how to make your old cabinets looking fresh and new! ..
This is not sponsored… let me tell you! The kit I used on these, is THE BEST!! The perfect color, and it’s so much easier than the others that I’ve tried! I also used a spray paint on the hardware and it worked so well! It’s been a year and they have held up great!
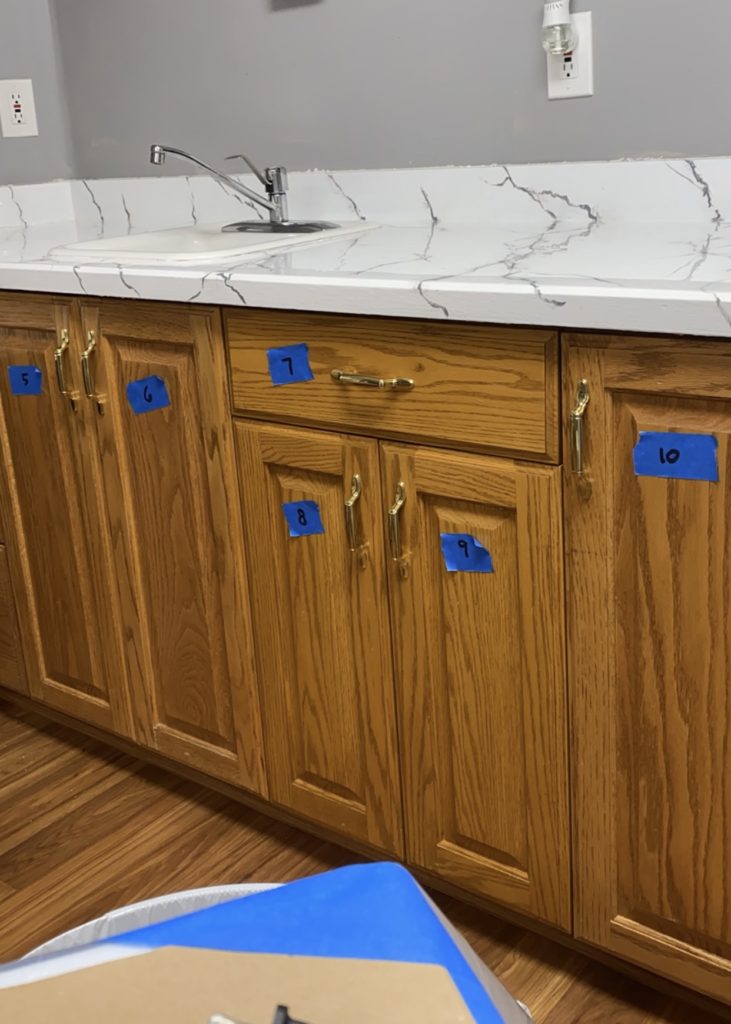
STEP 1: Number and Prep
+ Number the cabinets.
+ Put hardware in individual bags.
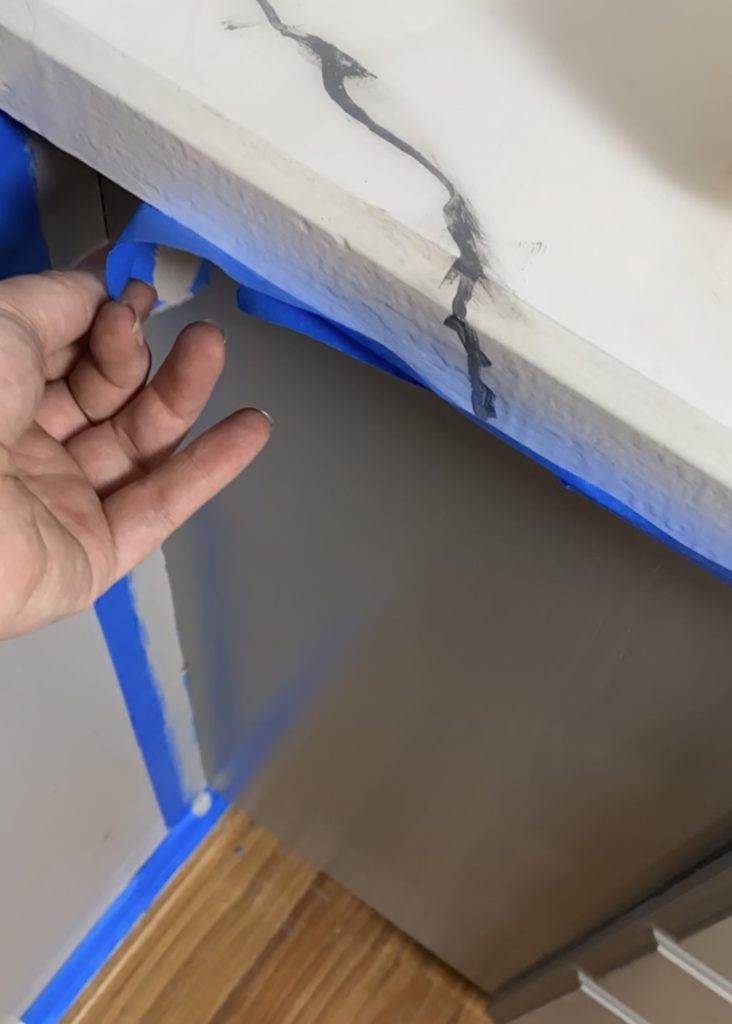
+Tape off any wood that’s touching the floor, walls, or ceiling.
Number the Cabinets
I like starting from the top left, and moving toward the bottom right.
Place them on a surface prepped for paint. (I laid them flat on the surface, but I recommend raising them… you can do it easily with cans on each side)
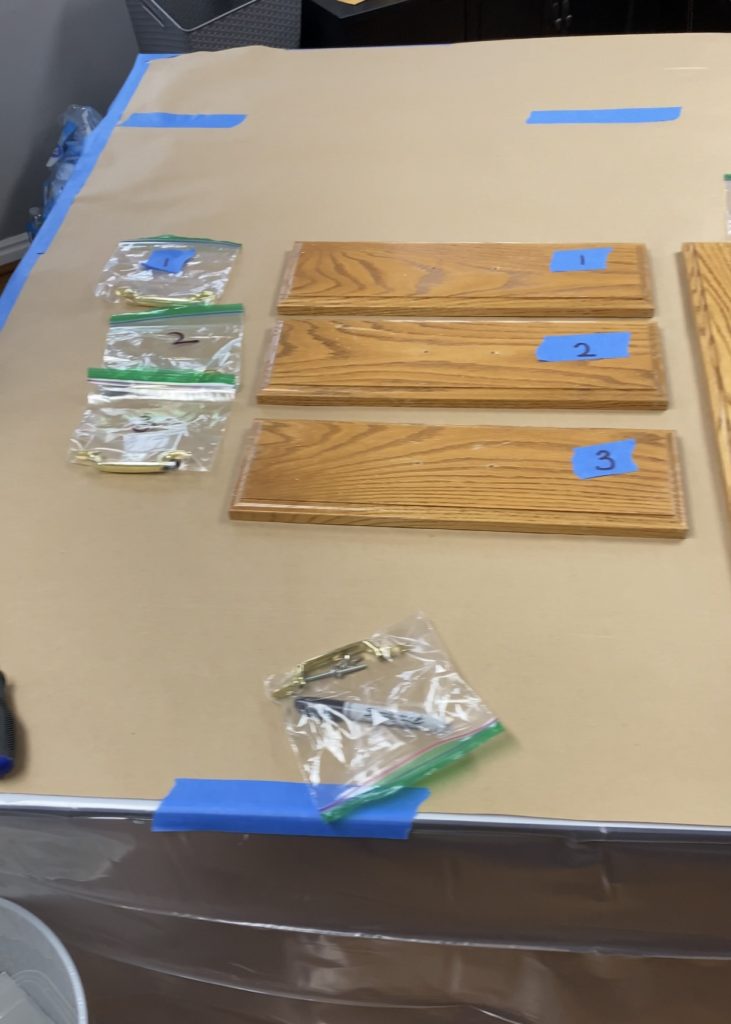
Bag the hardware
After numbering the cabinet faces, remove the hardware and place them in separate numbered bags.
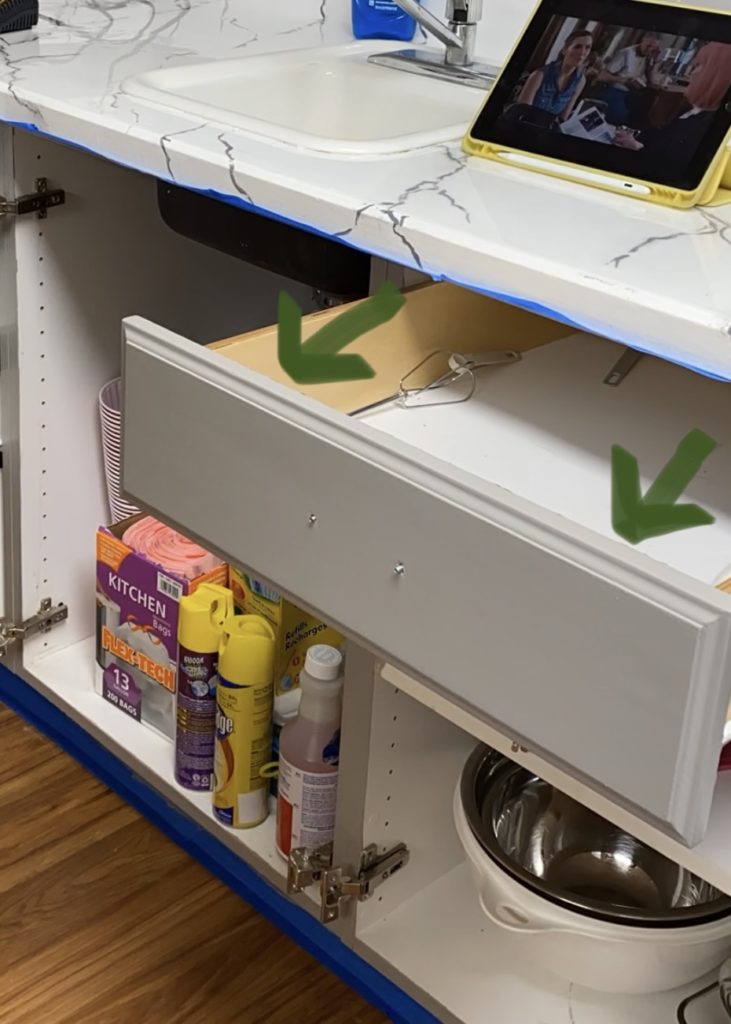
Step 2: Remove Cabinet Faces
+ Here’s how I removed mine, yours might be slightly different but hopefully this helps.
Removing Drawer Faces
The drawers are held up by two screws (where the arrows are) AND by the screws that the drawer pulls are attached to.
Removing Cabinet Faces
There’s no need to take off the hinges. You can just unscrew the two screws that attach it to the cabinet door, and then pull it off of the hinge.
You might need to wiggle it off, because the hinge sits inside of a hole in the cabinet.
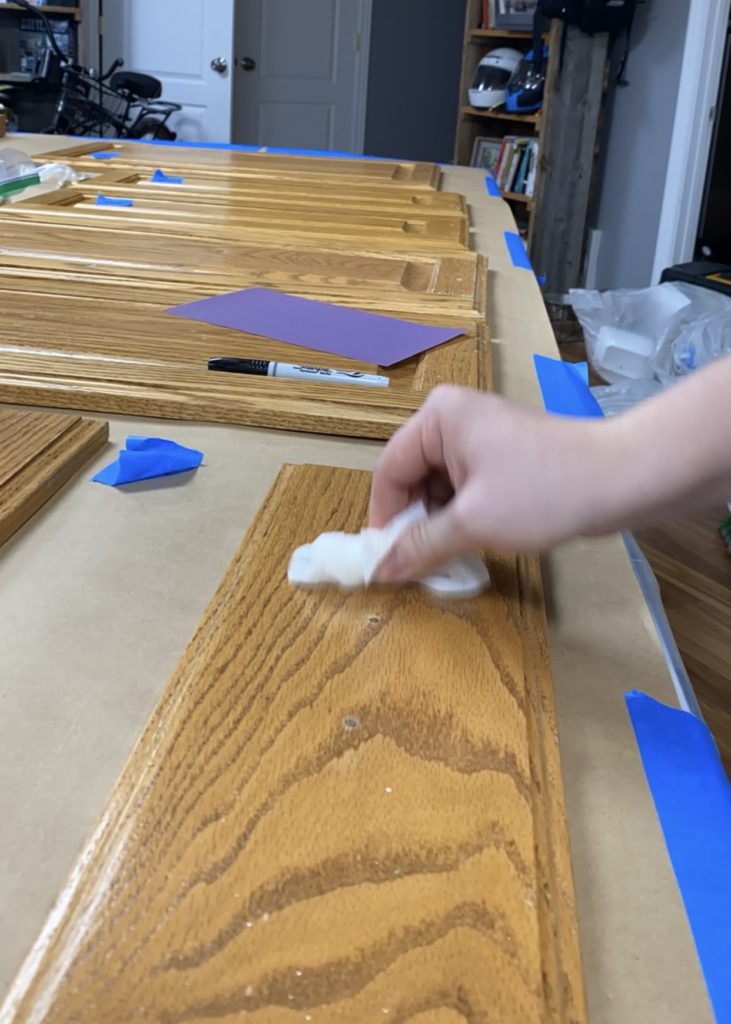
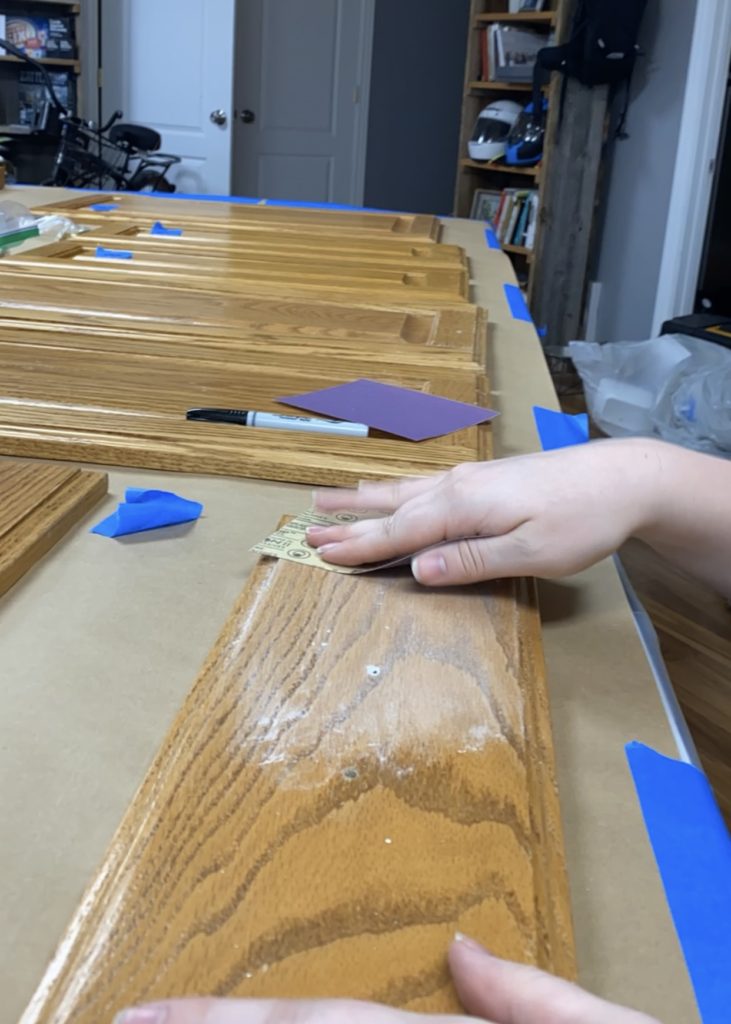
Step 3: Clean and Sand
+ All the tools I used are linked at the bottom.
+Do this to any wood showing on the cabinets attached to the wall, as well.
+Don’t forget to clean again after sanding!
Start with cleaning the cabinets
(Don’t forget to clean them after sanding as well. (I used TSP paint prep, linked at the bottom)
Sand using 220 grit
You caaaan skip this step, (I tried it on a side one, but it definitely makes a difference. It’s worth the effort!
I would recommend getting a sandpaper handle to prevent hand cramping! (linked at the bottom)
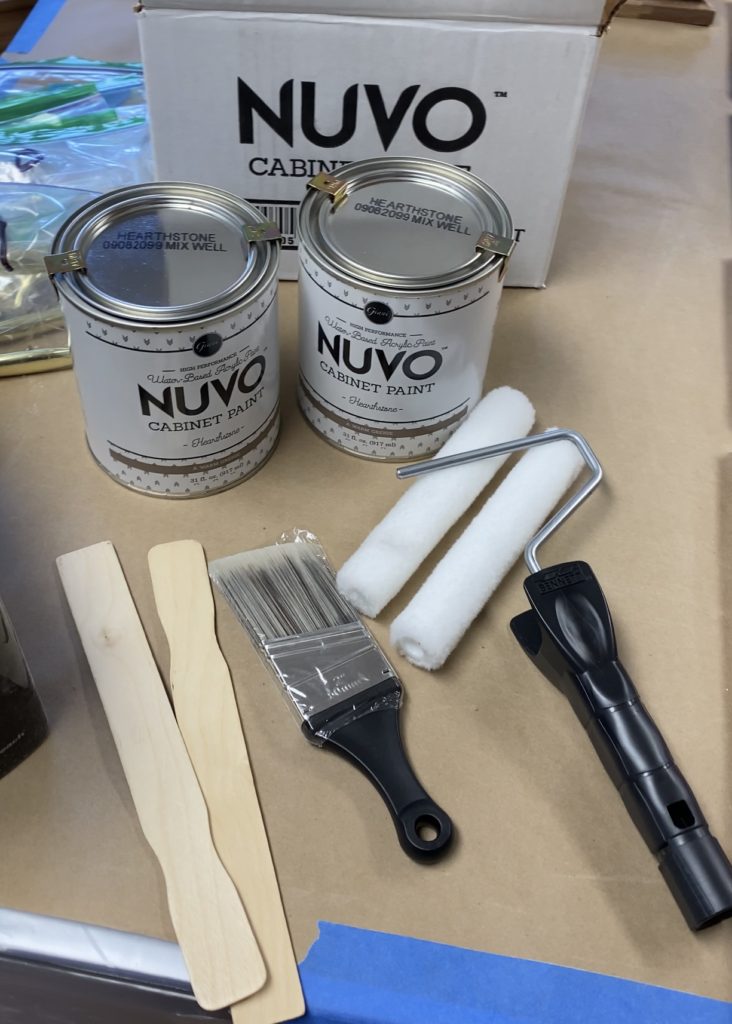
Step 4: Paint prep
+ Ok… this is the best kit!! I have used the Rust-oleum kit in the past, and I’ve tried to paint them on my own. Hands down, this one is the best!! It comes with everything you need and the color is perfect, with great coverage! (I do use the Rust-oleum spray paint for the hardware though!)
Prep for Paint
Make sure to tape off any of the wood that is touching the wall, floors, countertops, or ceilings. I also laid out brown paper to lay the cabinet faces on.
*tip: I laid them flat, and they ended up getting stuck to the paper. An easy trick is to set them on canned food to raise them off the table
Nuvo Cabinet Paint Kit
This kit comes with everything you need! The only other supplies needed is painters tape (For the cabinets attached to the wall), and a roller tin to pour the paint into.
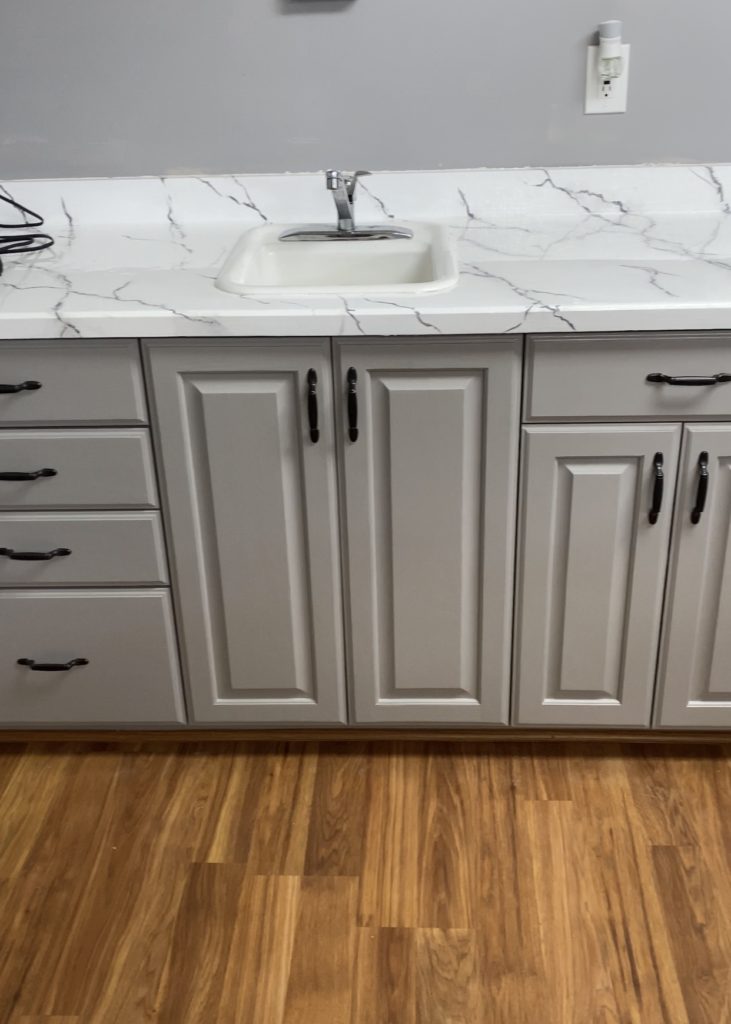
The color I got was: Warm Greige and it turned out so beautifully!
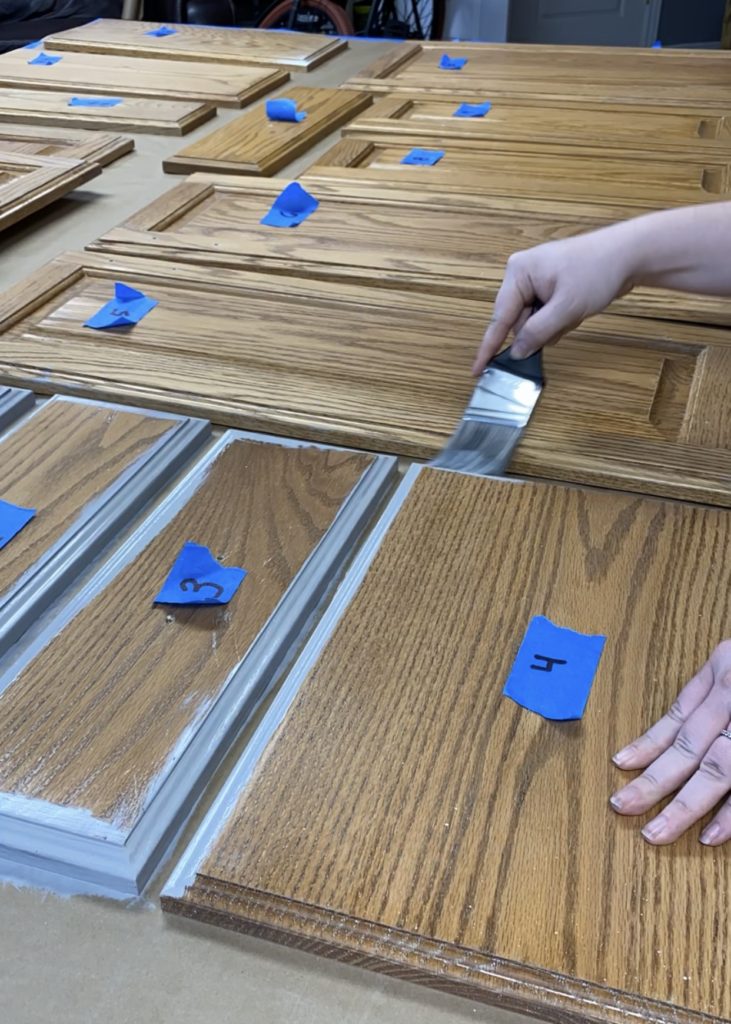
Step 5: Paint!
+It’s finally time to paint, let’s dive right in!
+You’ll need to do 2 coats!
Start with edges and grooves
Start by using the paint brush to get in any grooves and go around the edges. I also painted the edges of the cabinets attached to the wall at this point.
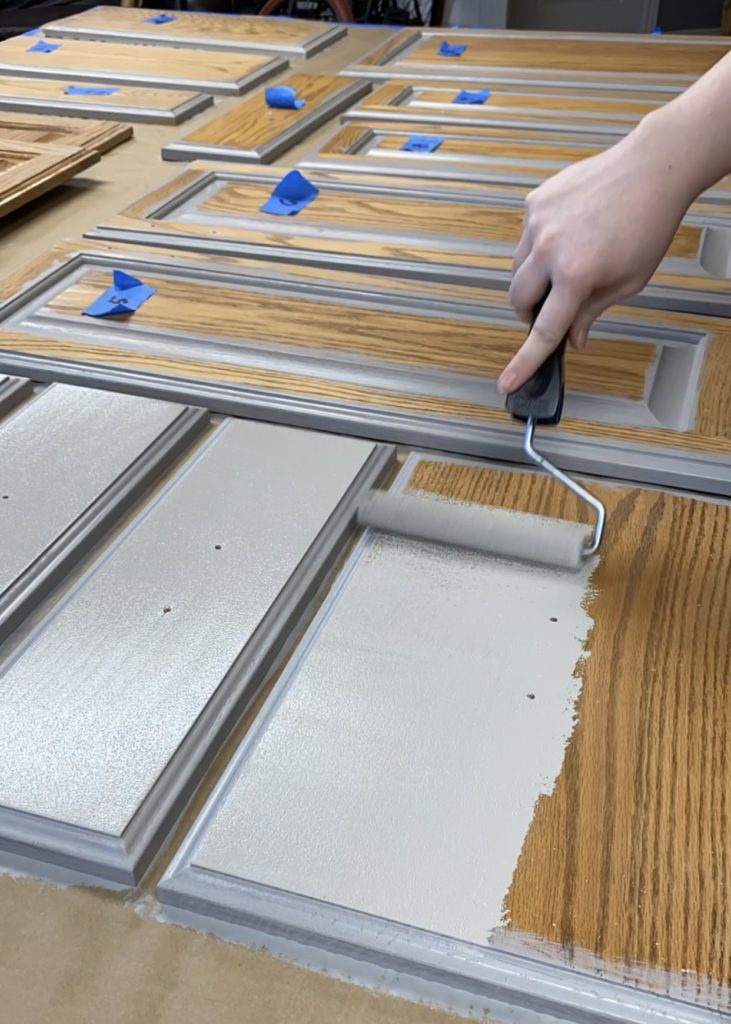
Move on to Rolling
After the edges are done (I think this is the fun part!) It’s time to roll!
It’s ok to do a thin coat, and as it dries, it might look a little uneven. That’s what the second coat is for!
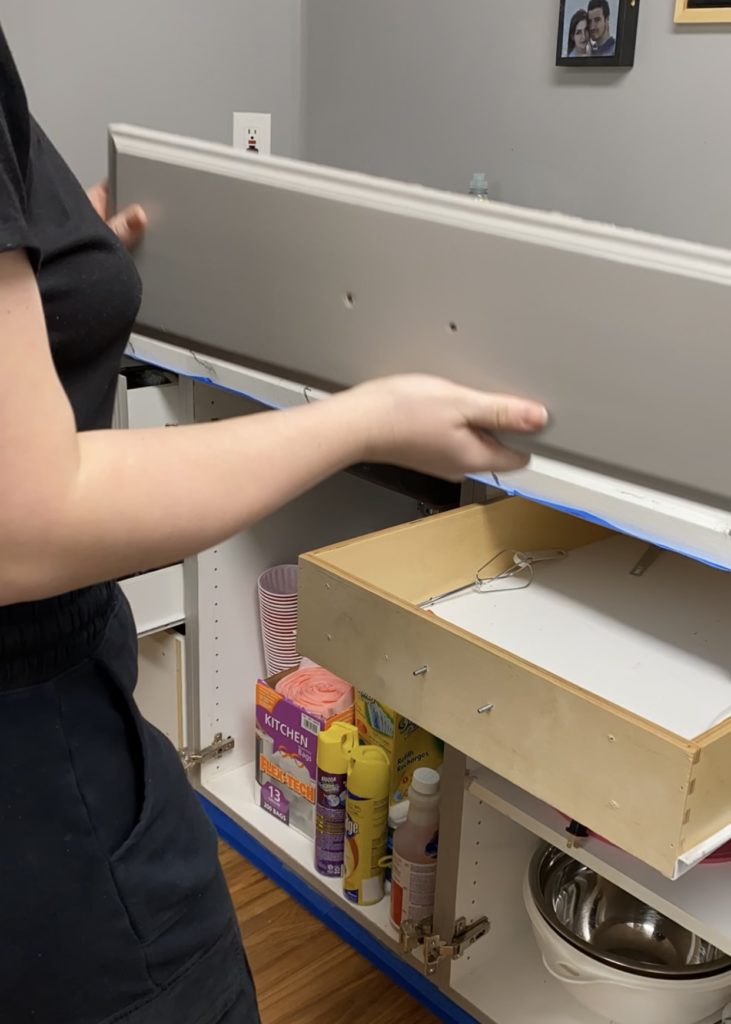
Step 6: Put it back together
+Pull tape, attach the drawer and cabinet faces.
Pull the Tape
It’s best to pull the tape while the second coat is still wet! If you wait until it dries, it’s more likely to peel the paint.
Re-attach the Faces
Re-Attach the cabinet, and drawer faces.
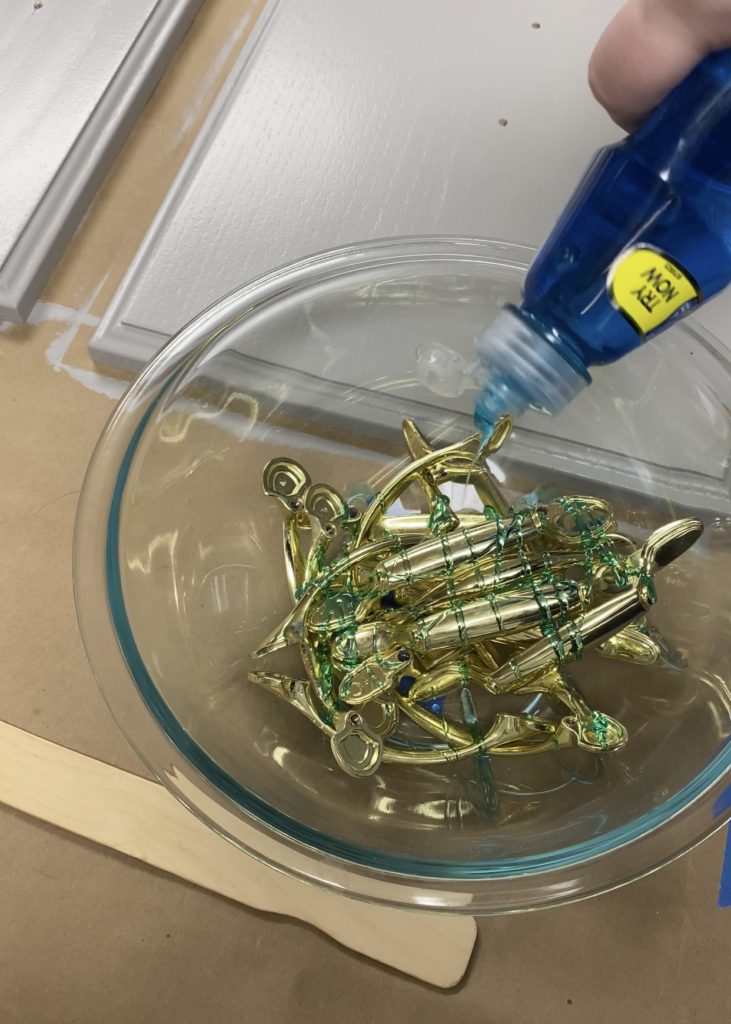
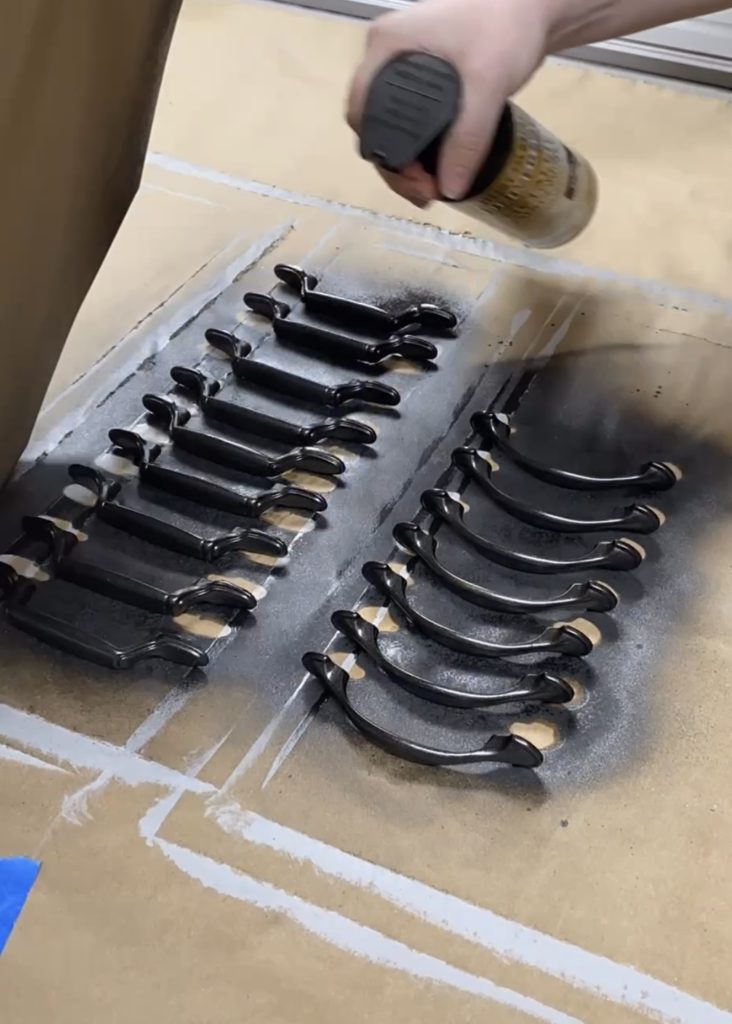
Step 7: Renew the Pulls
+If replacing the pulls are not in the budget, this is an easy way to refresh the ones you have.
Clean Really Well
This is probably the most important step (for the pulls). You don’t realize how nasty these things are, and if you don’t get them clean, the paint wont adhere properly. I used dish soap and water.
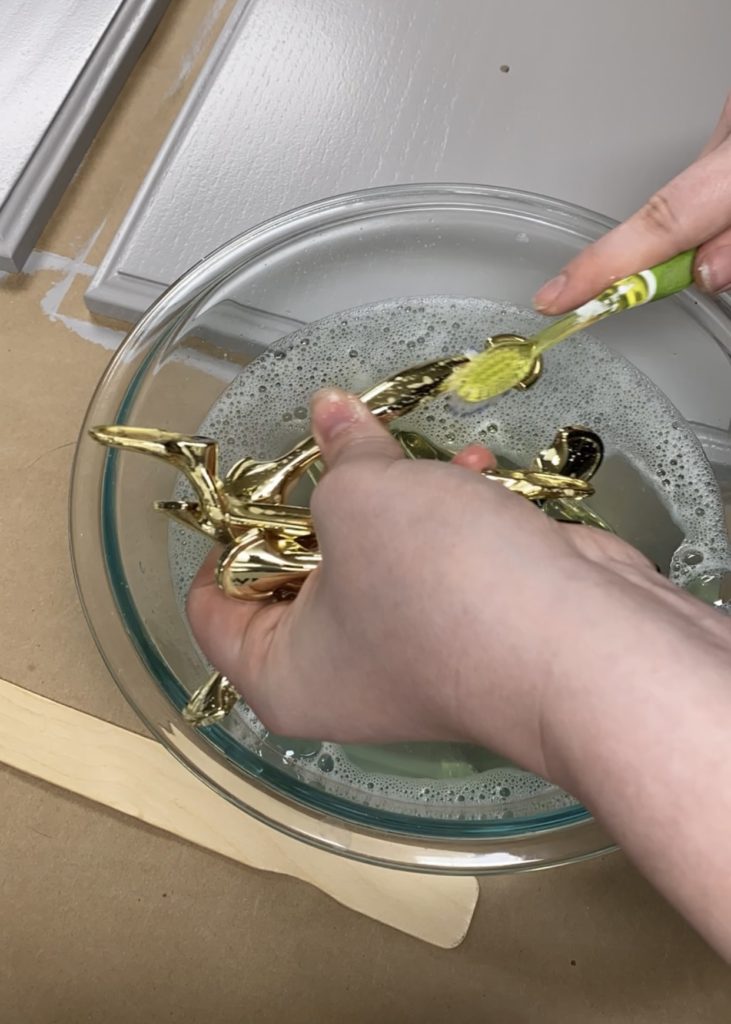
Scrub them down
After letting the pulls soak, I scrubbed them with a toothbrush to make sure they were really clean. Then, rinse them well.
Step 8: Paint!
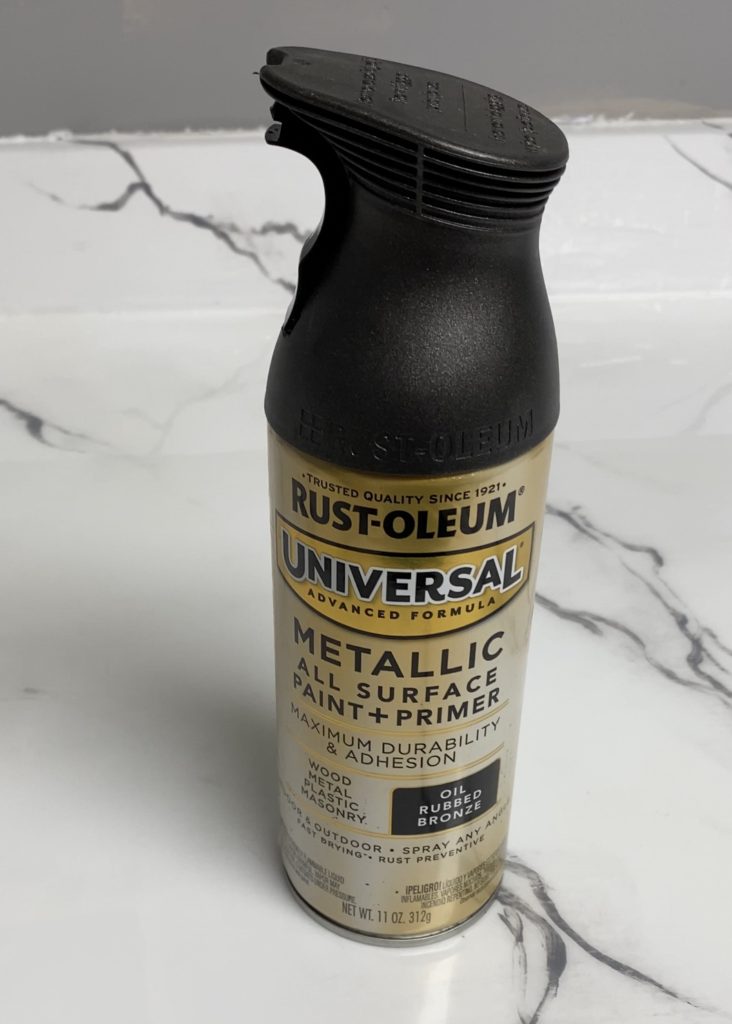
+This Rust-Oleum spray is so cool! I used it a year ago, and it is still holding up perfect!
+My mom used it in her kitchen 4 years ago (with 3 kids) and they are ready for a new coat.
Rust-oleum Metallic Spray
This spray comes in multiple different colors! I absolutely love it!
Spray from all angles
Spray the top, let dry, then both sides.
Re-attach the pulls, and you're done!
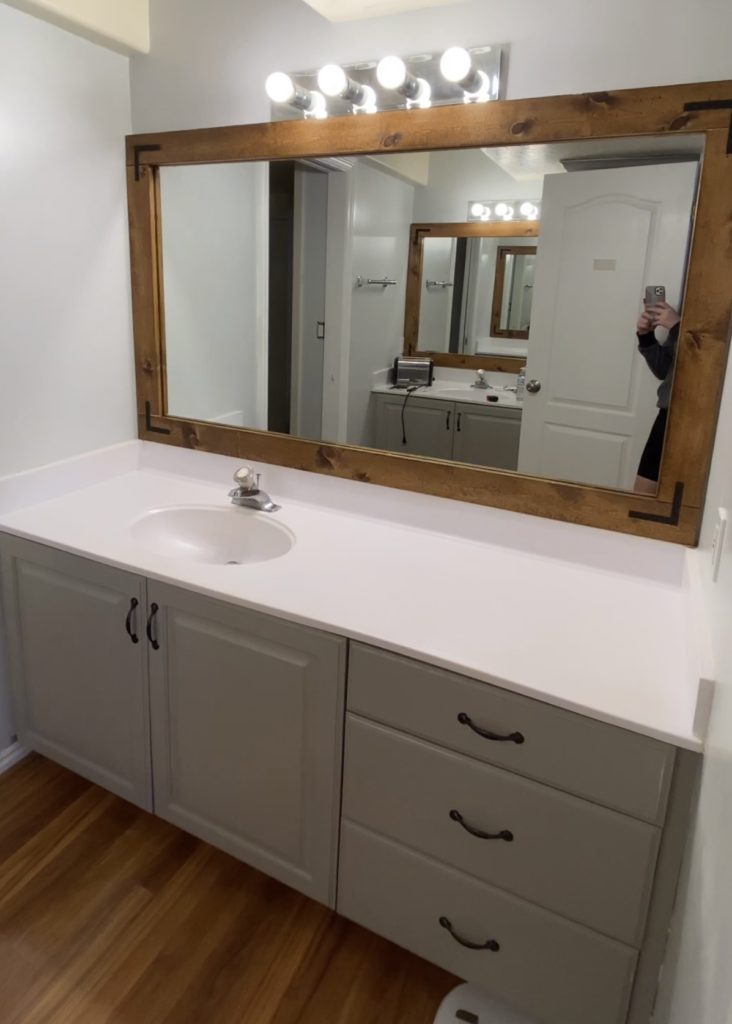
+Before and After!!
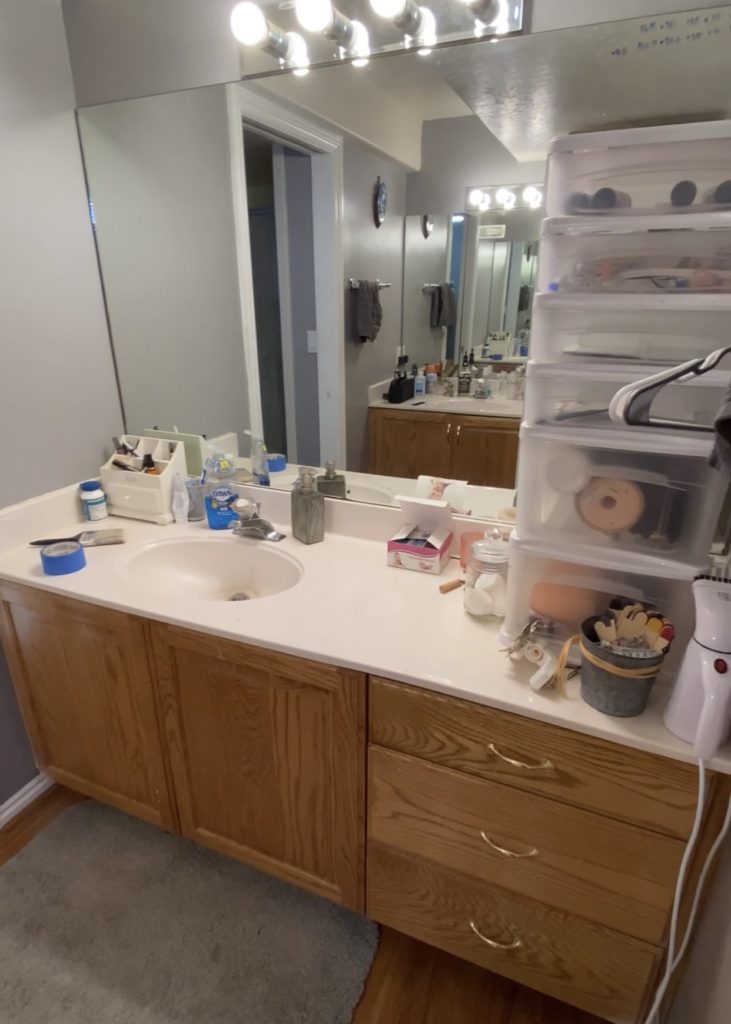
+I also did the bathroom ones, they look so much better! (Bathroom Refresh Blog Post …Coming Soon…)
Framing the bathroom mirror will be posted next, I can’t wait! To follow along with the projects I’m currently doing: follow me on Instagram! Current projects are always in stories, and past projects are in my highlights:)
Before we even put an offer in on our home, I knew that Mav’s nursery would be the first project I would tackle! After our offer was accepted, I did a deep dive on Pinterest …
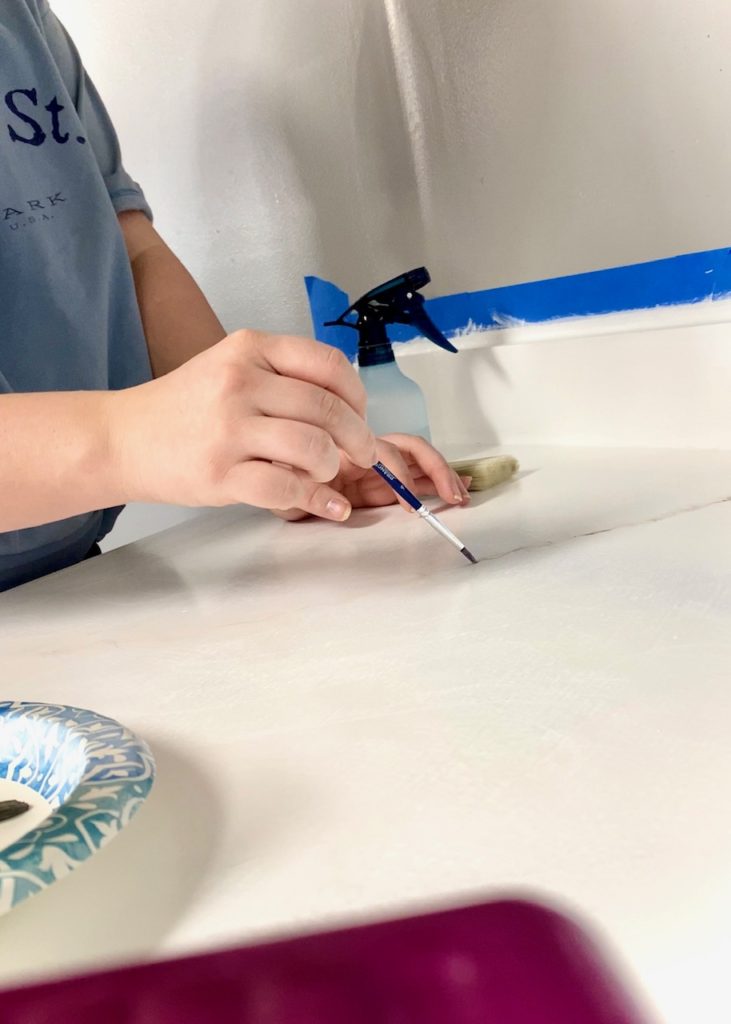
DIY Painted Countertops (Step-by-step)
So … I was in a bad mood one day and I was staring at how ugly the space i was living in was … (Ugly is a little dramatic, but in the moment, that’s all I could think) So …
Here are the step by step instructions on how I did it, and what I would have done differently …
The Beginning of My diy Journey (And What's To come...)
Hello, and WELCOME!! This is my first blog post (woohoo!!). You can learn a little bit more about me on the ”Meet Ashli” page, but I just wanted to briefly introduce myself and show you a little of what’s to come:)
I’m Ashli, and I have a passion for DIY projects! In 2020 I was in my third year of battling with infertility, and I was desperate for a distraction. I was working as my husbands……